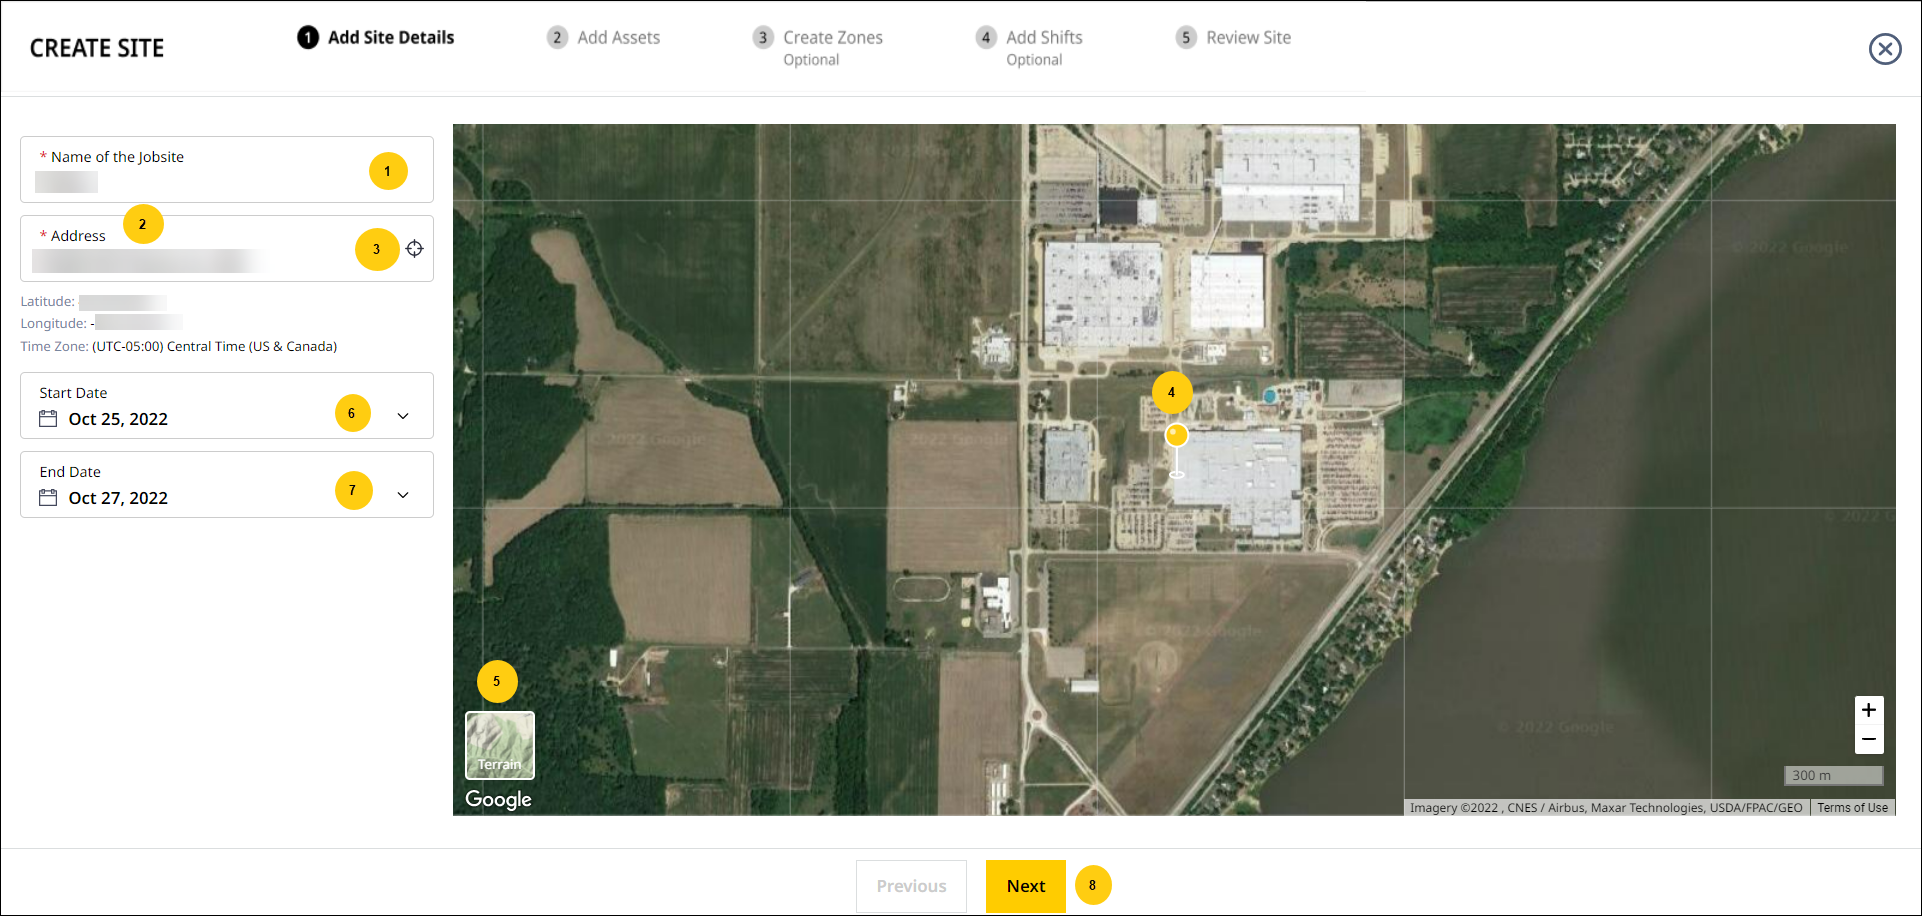
Add Site Details
As the first step of the Create Site process, you need to name, provide address and add start and end dates for the new site.
This helps:
-
Provide a unique identity for easier searching and analysis later.
-
Create zones and events using the provided address.
-
Track the timespan of the site and notify when a site is nearing completion.
The filled-in information will reflect across your account.

All fields with * need to be filled to proceed to the next Add Assets step.
-
Name of the Site: Provide a unique site name, ideally with identifying cues for easy recollection and faster searching.
Ensure the following criteria are met when naming the site:
-
Address: Enter where the new site is to be set up. The field is auto-populated so you can quickly select from several possibilities as you type.
View Latitude, Longitude as well as the Time Zone under this field.

Right-click anywhere on the map to view latitude and longitude details. Click copy next to it to copy the coordinates.
View ImageView Image
.png)
-
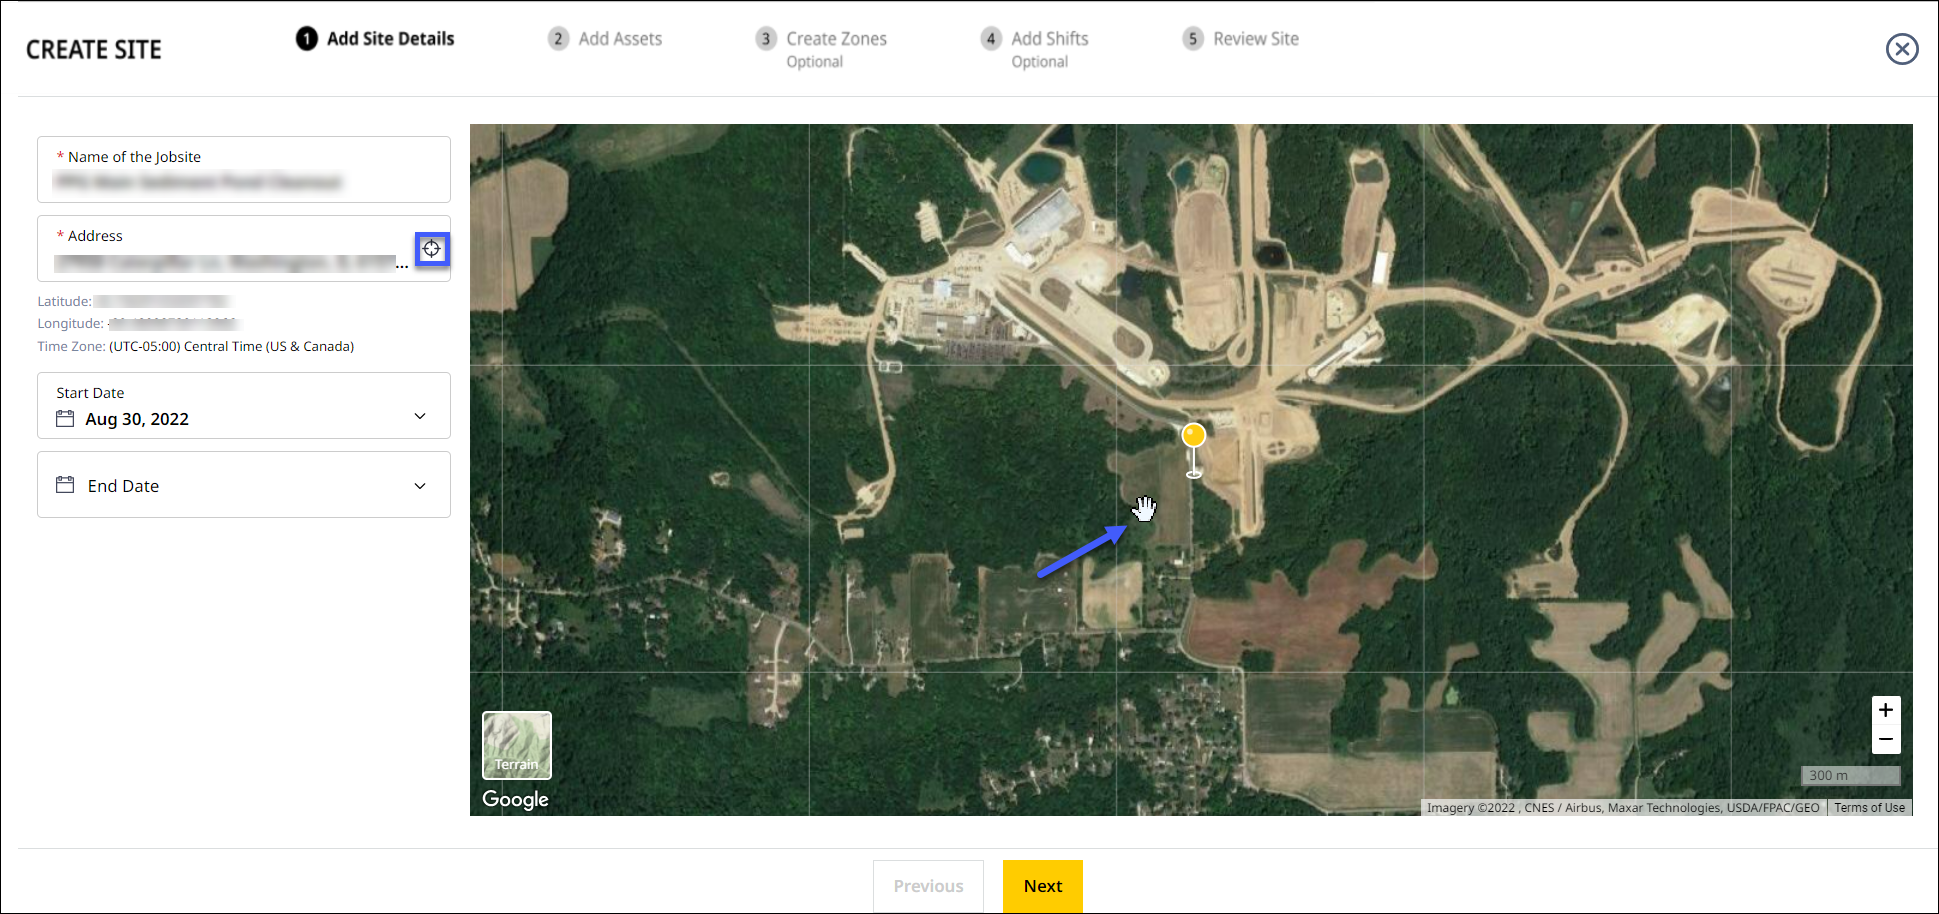
Locator: Use
 to manually locate the site more accurately and quickly. On clicking this, the
  pointer moves the map, thereby helping you place the
  pin at the precise spot with ease.
Click recenter to return the pin to your current location. Note that this only works if your Google location is turned on.
View ImageView Image
-
Set Current Location: Select Yes if your current location is where you wish to set up your site. Else, click No and manually select the new site address.
• By default, the pin is located at center of the map, indicating the current location, which is accurate only if the Google location is turned on.
• Allow Google to track your location in the pop-up that appears, for this function to work accurately.
• Change the browser settings manually, to let VisionLink Productivity track your location if you miss the pop-up. -
Terrain/Satellite View: Terrain shows only the physical features of the location.
-
Satellite provides a more detailed view, using Google Earth satellite images.
-
Switch between these two using Terrain
 and Satellite
  .
. -
Start Date: Set when the site will start operations.
By default, it will set the current date as the Start Date.
-
End Date: Set when the site will stop operations and cease generating data.
For sites with no set end dates, you can leave this field blank.
-
Next: Once you fill up all the fields, click
 to save the information and move to Add Assets.
Related Topics