Add Assets
The Add Assets step helps you configure assets and tags for the created site. The selection of the asset tag helps in calculation of cycles in an accurate manner.


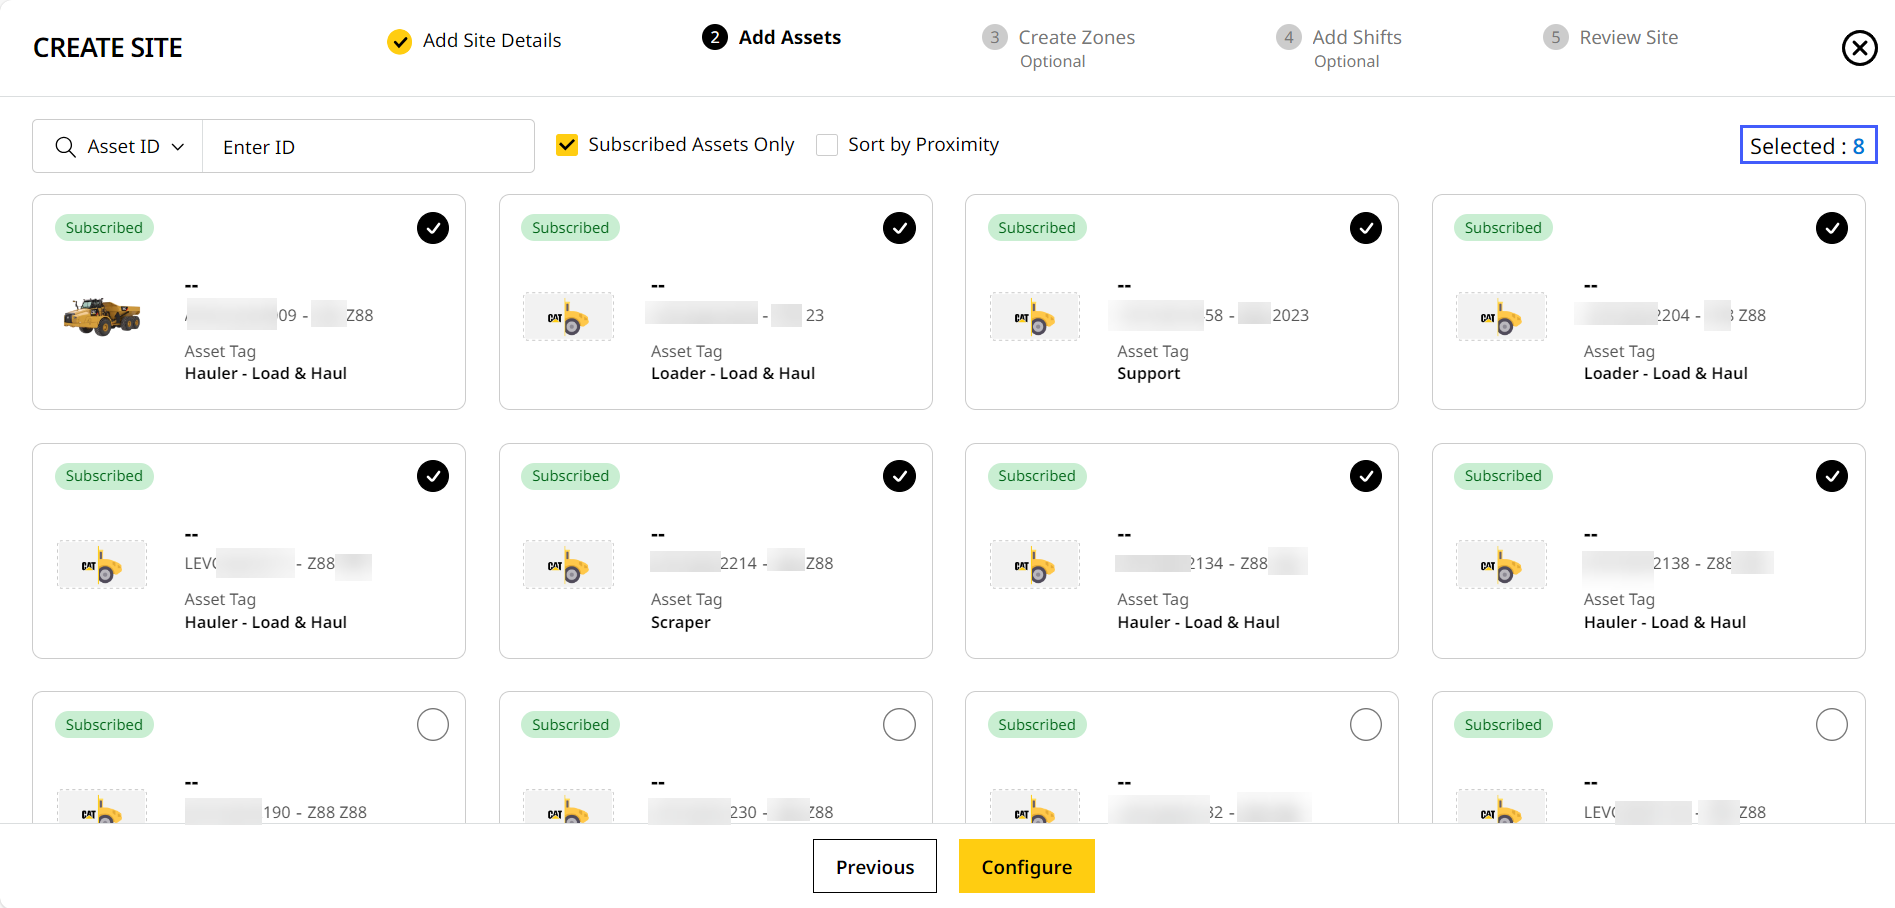
• Toggle between Asset ID or Serial Number and enter respective parameter to search for an asset.
• Subscribed Assets Only option is enabled by default for PerformancePro assets. This helps speed up and ease adding and configuring assets.
• Use Sort by Proximity option to find subscribed assets within the proximity range (i.e., 1 mile = 1.61 km) of site location set in Add Site Details. Such subscribed assets are displayed in the first row followed by other subscribed assets. You can enable the Sort by Proximity check box only after selecting the Subscribed Assets Only option.
Elements of Asset Card
An asset card contains some key details about the asset.

Some key points to note:
-
The asset icon represents the model of the selected asset.
-
If the model exists for Cat and other than Cat equipment, then specific image of the respective asset is displayed in the asset card.
-
If no model exists for Cat and other than Cat equipment, then default image is displayed in the asset card.
-
-
When assigning an Asset ID, Caterpillar recommends assigning the ID as an identifier of the asset. Please do not add a reference to an individual operator to the asset ID.
-
In case of shared asset(s), respective indicators (shared to
 or shared from
  ) will be displayed next to the asset, denoting if the asset is shared from or to another account (CCID). Refer to Shared Assets to know more.
Refer to Asset Tags for more information on understanding functionality of each asset tags. Contact your dealer for any additional information about subscription, asset ID, serial number and make or model.
Configuring Assets
-
Click add
 next to a subscribed asset to assign it to the site. This icon displays only for the assets subscribed to Advanced Productivity or VisionLink Load and Cycle, through Dealer Services Portal (DSP). If the asset is not listed in the Select Assets step, then you can contact your dealer for more details.
 -
The tick mark
 indicates that the asset is assigned to the site. The same assets can be configured for more than one site. The total count of selected assets displays on the top right.
Hierarchy of Assets
• If the asset is already mapped to the site and removed recently, and again the same asset is added to the site in the same account, then the same tag is assigned to the asset.
• The asset is assigned automatically to the site based on the most recently assigned tag for the same asset in another site.
• The asset is also assigned automatically based on the Caterpillar product family. If the assets are not auto tagged in any of the above criteria, then assign tags to the asset on Configure.
-
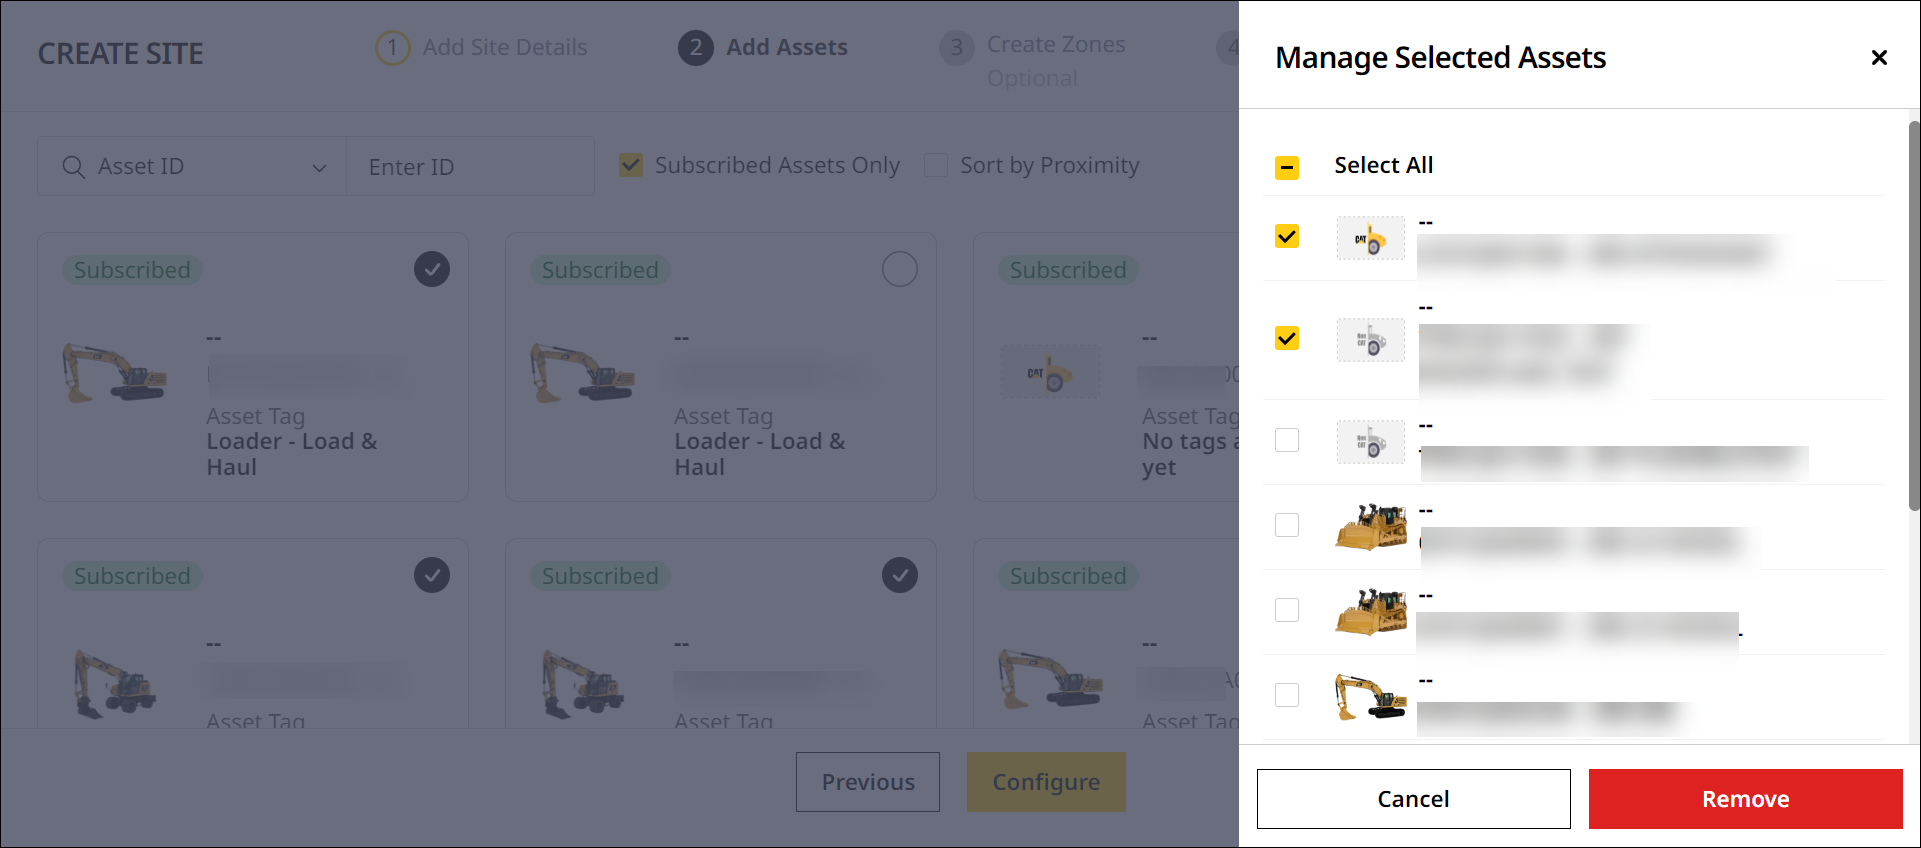
Click the Selected link to view Remove Assets. It is enabled only after any assets are selected. Click Select All to remove the selected assets or on each asset card to remove the respective assets.
-
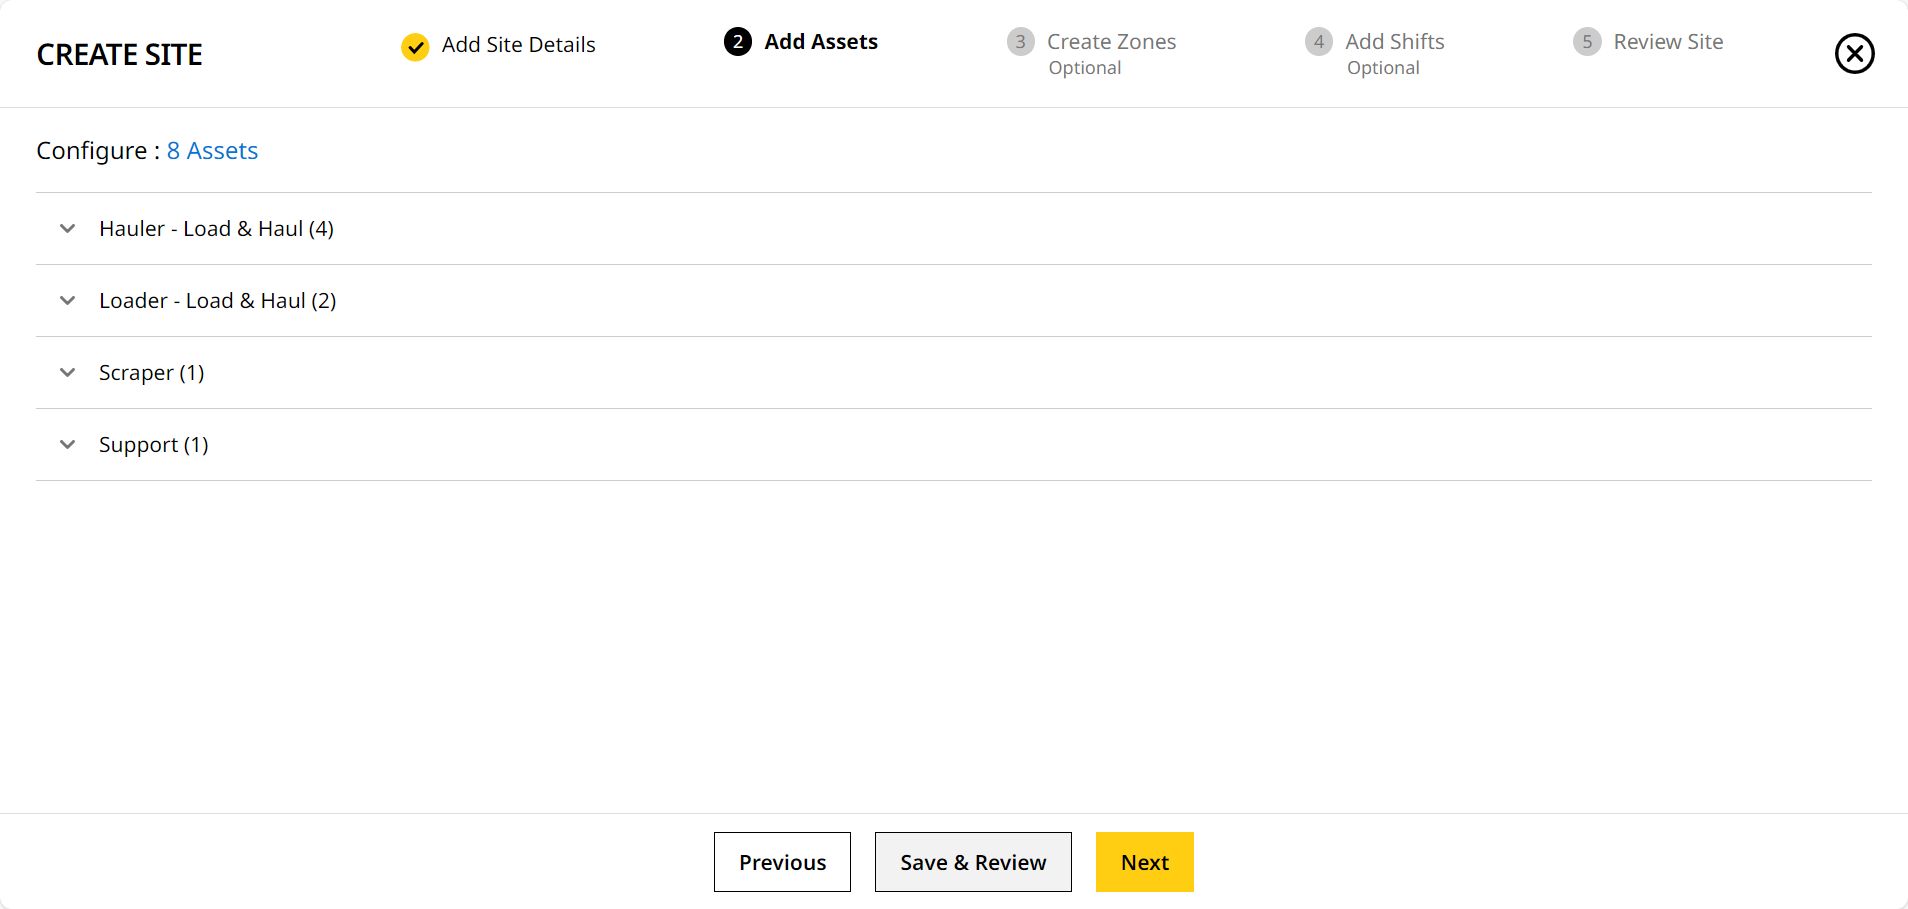
Click Configure below to open Configure section. Here assets are categorized and displayed under their original asset tags, both identified and unknown.
-
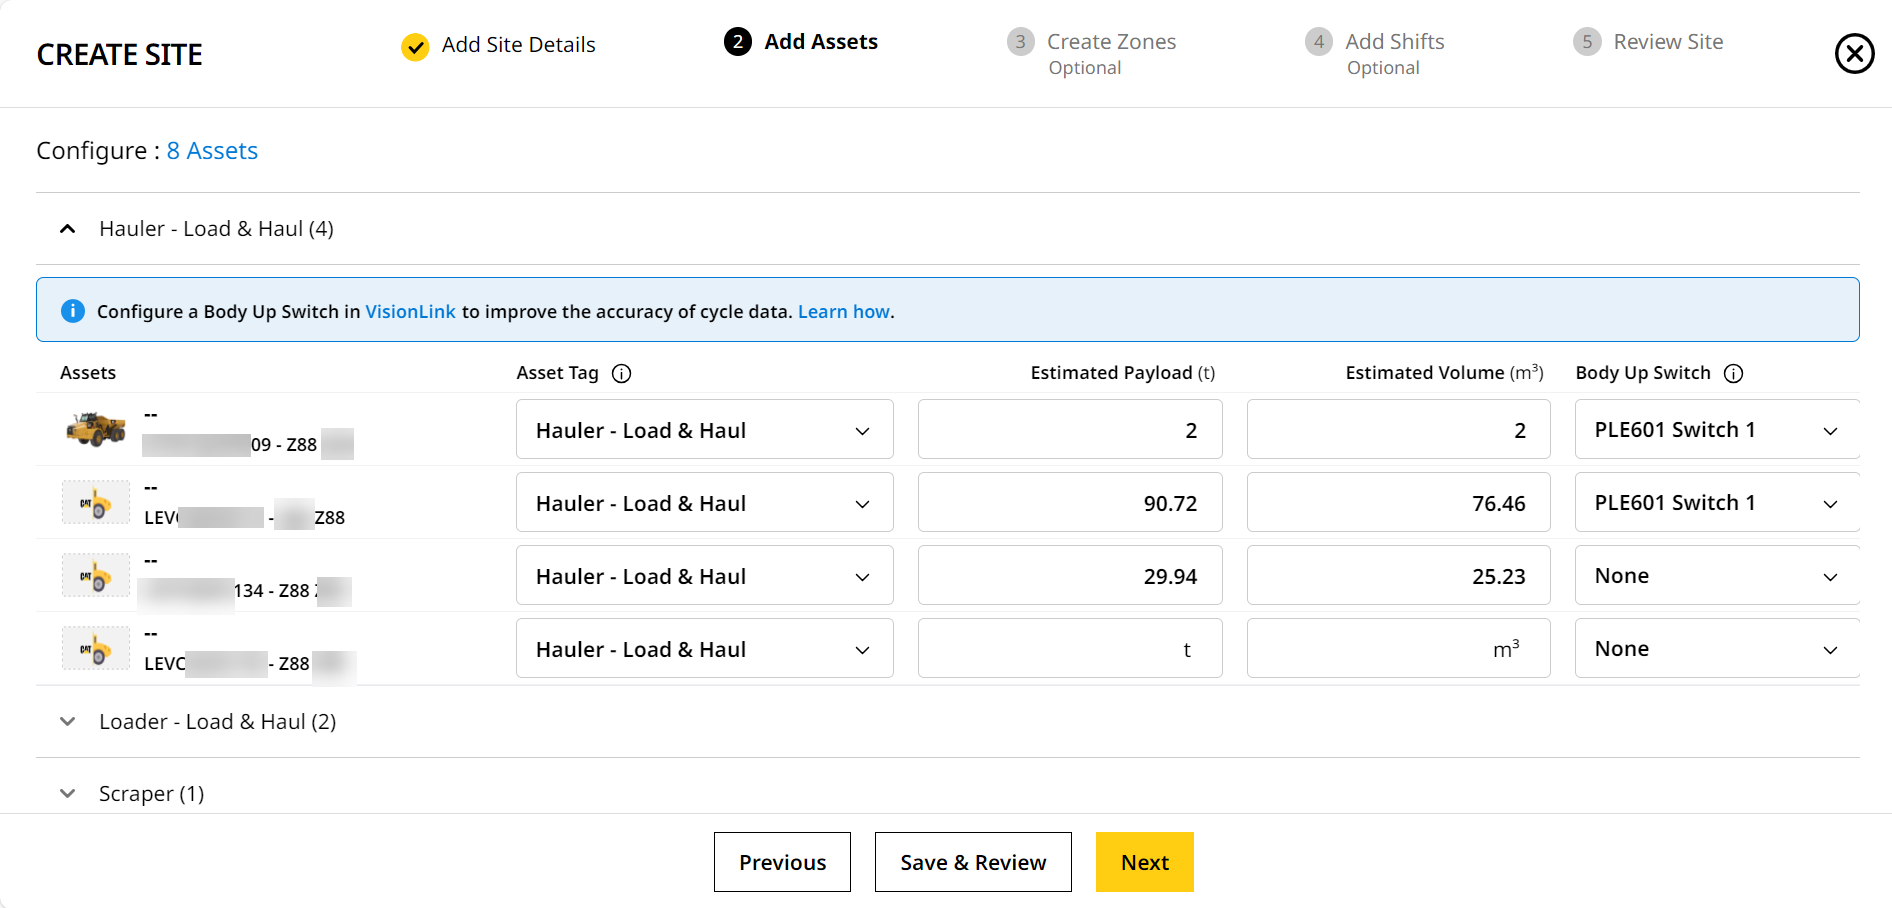
Assign or change the asset tags for all assets. Add Capacity values and assign Body Up Switch for assets with a Hauler - Load & Haul asset tag.
-
Select Asset Tags: Assign Asset Tags based on the chosen assets. All selected assets must be assigned a tag. The listed asset tag may vary based on the industry type. The assets with already assigned tag will also be displayed in the Assets with Assigned tags selection of Configure. An asset cannot be assigned more than one asset tag.
• If you have a Performance subscription for an asset, the Asset Tag will be set to Support by default. To change the asset tag, upgrade to PerformancePro.
View ImageView Image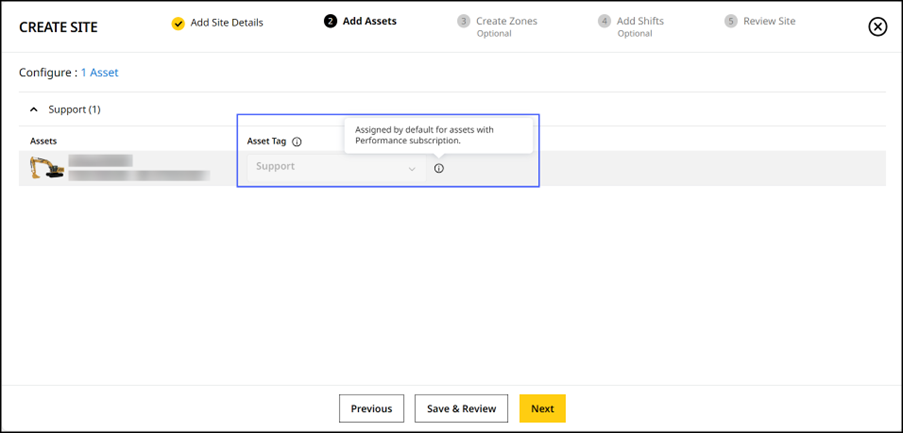
• Select the right asset tag for an asset so that the displayed site and asset data is accurate.
° You can change the asset tag later without any data loss, but it may lead to discrepancies in analysis.
° To know more about modifying asset tags, refer to Edit Site. -
Enter Capacity: Units for the Capacity field are based on your set Preferences.
It includes: -
Enable Body Up Switch: Body Up Switches for hauler assets can be enabled only if they are configured in VisionLink
 .
.An existing asset configuration of Estimated Payload, Estimated Volume and Body Up Switch is auto assigned when editing or copying a site in some situations. If the assets are auto-tagged and no changes are necessary in Configure, then click Next to continue to Create Zones. For assets added to multiple sites, the recently configured values are auto-assigned.
-
If an asset was assigned to the same site, but was removed recently, the existing configuration is reused.
-
If there is no existing configuration for the same site, but the asset is assigned to another site within the same account, the configuration from another site is auto-assigned.
-
-
-
Once the assets are assigned or reassigned with tags, the assets will be displayed under the updated asset tags section.
You need to upload a calibration file if you're adding Grade or Compact assets to your site. -
Click Next to proceed to Create Zones. Or click Save & Review to directly head to Review Site.
Target Payload
This payload KPI type helps you configure a maximum Target Payload to hauler assets for a site. With this, you can track instances of payload going over the target value, helping ensure longevity of asset health.
You can configure target payload when creating/modifying/copying a site to accurately manage payload data.

Track and visualize target payload data in the following places:
• You can set payload target for Hauler – Load & Haul and Scraper asset tags while only hauler assets will show overloading.
events.
• Ensure that payloads are within the target payload to avoid instances of Target Payload Overload.
• Target payload monitoring is only available to hauler assets subscribed to one of the following:
◦ Performance with Advanced Productivity
◦ PerformancePro
Shared Assets
View all assets that are shared to and from another account (CCID) with the following advantages in each case:
-
When another account (CCID) shares its assets, you can view production and utilization data of the shared asset(s) added for the specified time period by adding them to your sites.
-
While sharing asset(s) to another account (CCID), manage or revoke data access only for shared asset(s) within the specified time period.
You can know the shared asset status by referring to the following icons:
- Asset Shared From : Asset is shared from another account to your account.
- Asset Shared To : Asset is shared from your account to another account.

• An asset can be shared to more than one account over the same or different time period.
• Modify and manage sharing in VisionLink .
• Only an Admin can share assets owned by an account.
• Shared asset data (from another account) will no longer be available in the following scenarios:
◦ After cancelling a subscription.
◦ After the account Admin, who is sharing the asset, stops the share.
◦ After the time period of the share has completed.
• The above will affect only asset data captured from that day onwards. Prior shared-asset data will still be available in the site.